Building the Parlor Guitars
page 2
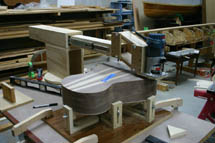
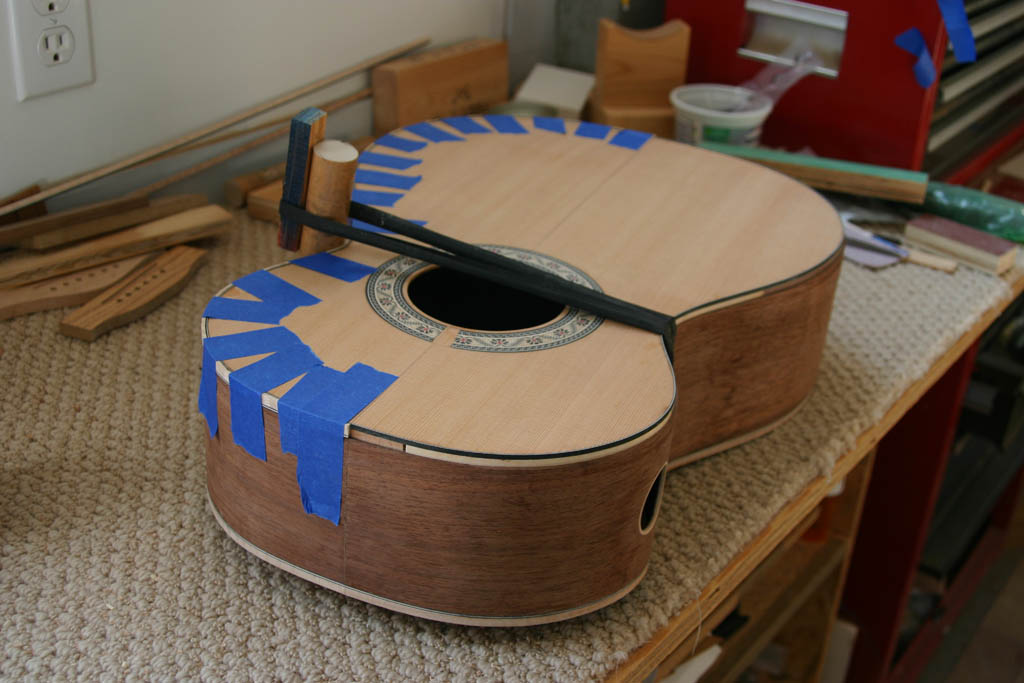
The Prototype Soundport
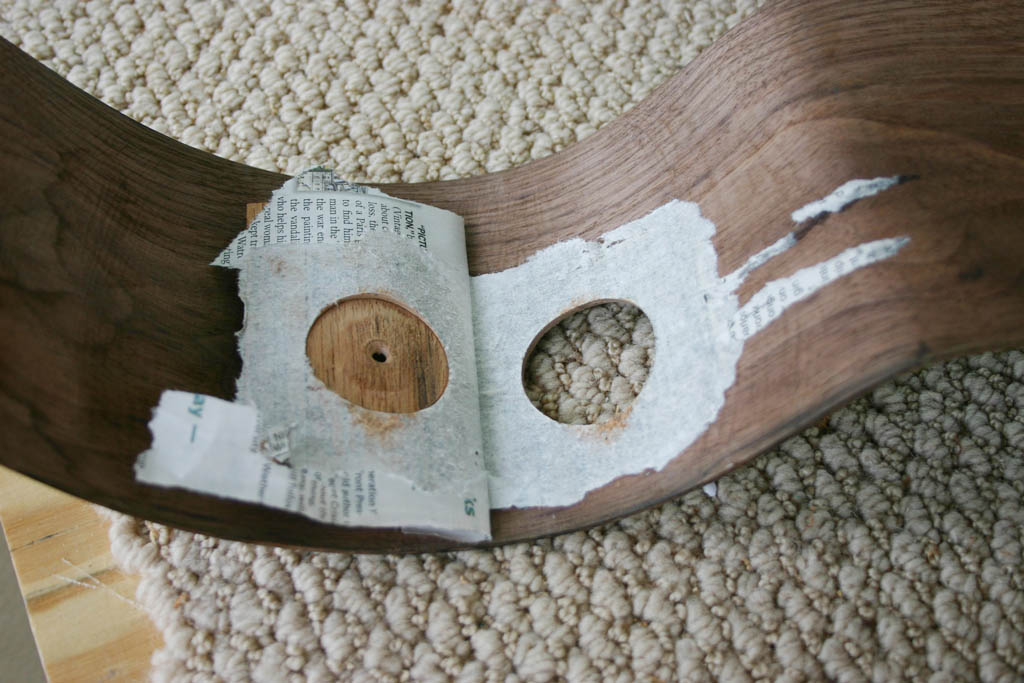
I cut the soundport after the side was bent.
I supported the side with mahogany veneers with newspaper glued between the veneers and the side wood.
This makes it easier to remove the veneers after the hole is drilled, and you can easily scrape or sand away the newspaper.
I should have drilled the hole when the side was flat, which is
what I did on Mike's guitar (photo at right).
Kerfed Linings
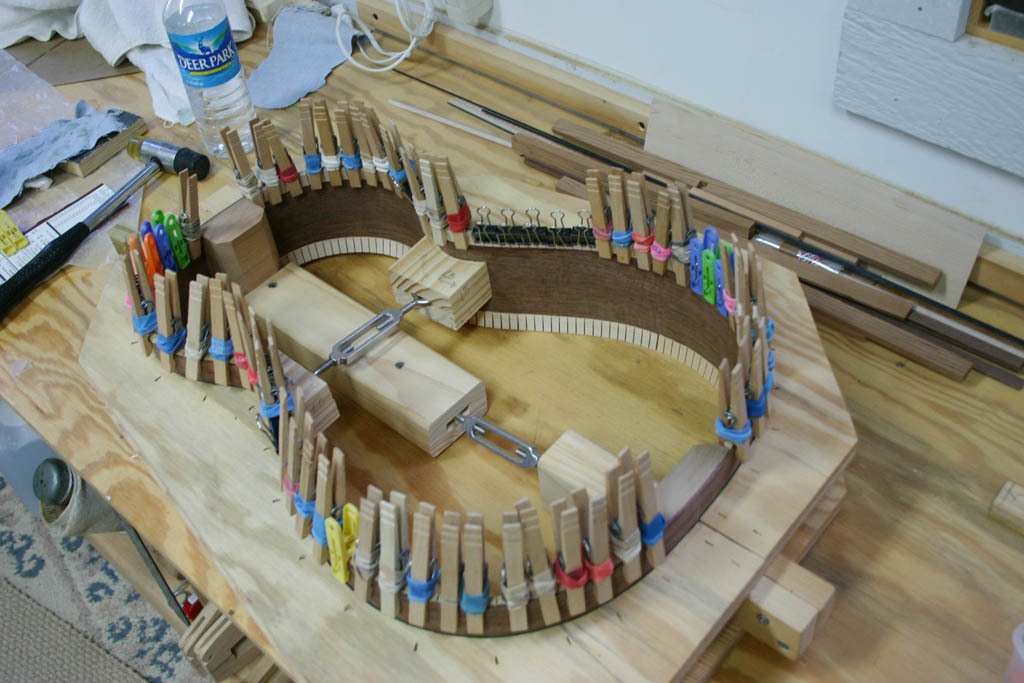
Linings glued and clamped

Linings done
Routing the End Wedge Channel

The End Wedge Channel
Preparing the Bindings
Glue purfling to binding prior to bending.

The bent binding with attached purfling

Jig for Routing the Binding Channel
Blackwater River Guitars
Building the Parlor Guitars - page 2
| Page 1 | Page 2 | Page 3 |
| Parlor #005 Gallery | Parlor #004 Gallery |
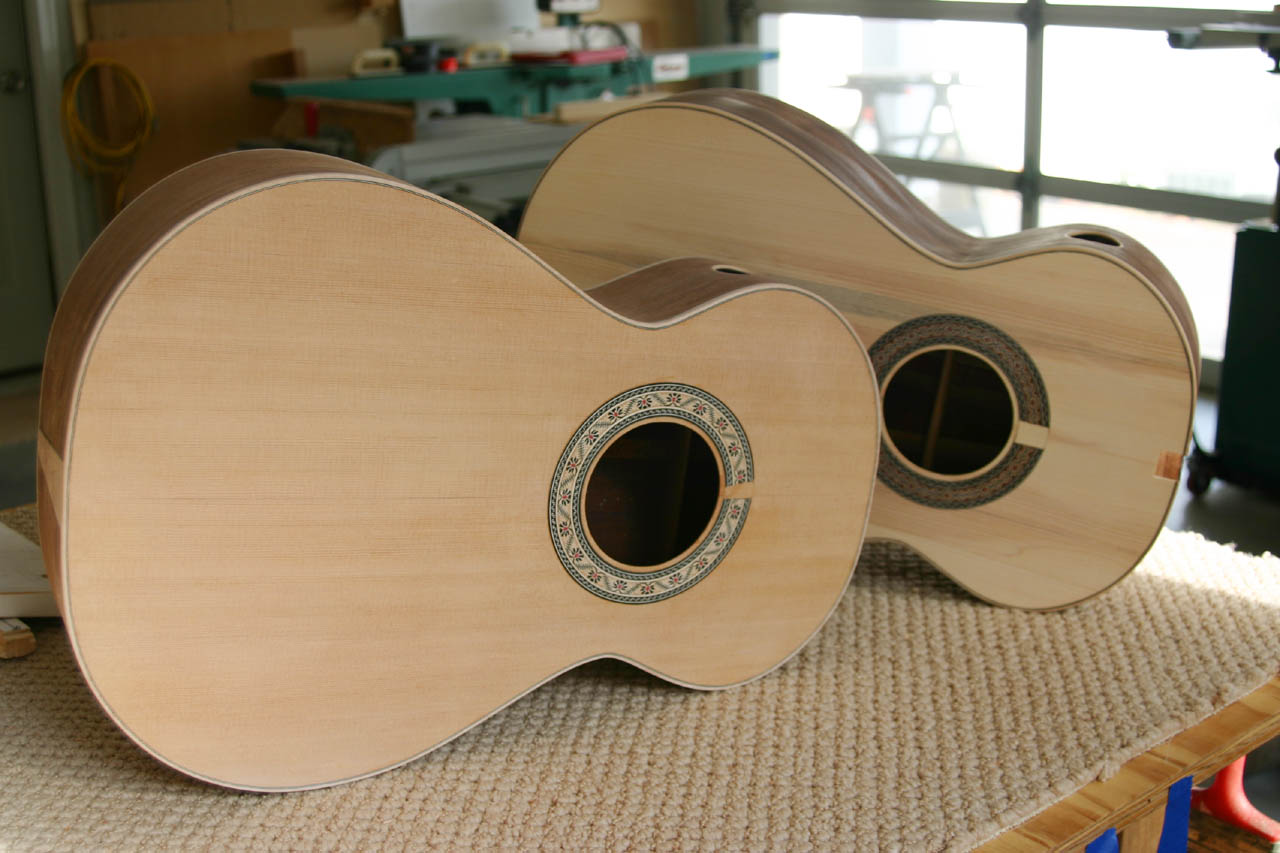
Bending Sides

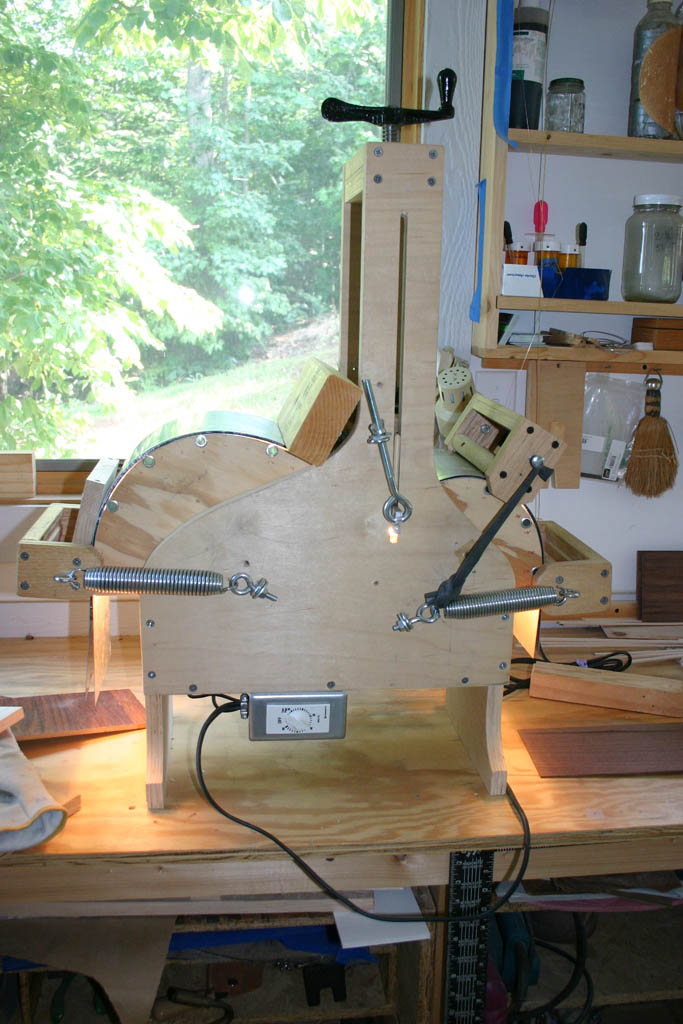
On the left are the walnut sides for Mike's guitar (from friend and luthier, Chet Dickerson). For this guitar I drilled the soundport hole prior to bending the side - so much easier than drilling a bent side (see photo at left).
The sides for the prototype (below left) were sawn from a walnut board I bought (cheap) from cabinetmaker, Nelson Kline. The board was somewhat twisted so he couldn't use it for any of his projects.

I milled it flat and was able to get the two bookmatched sides from it (and a third piece). It has some interesting, flatsawn, swirling grain.
.
.
Assembling the Body
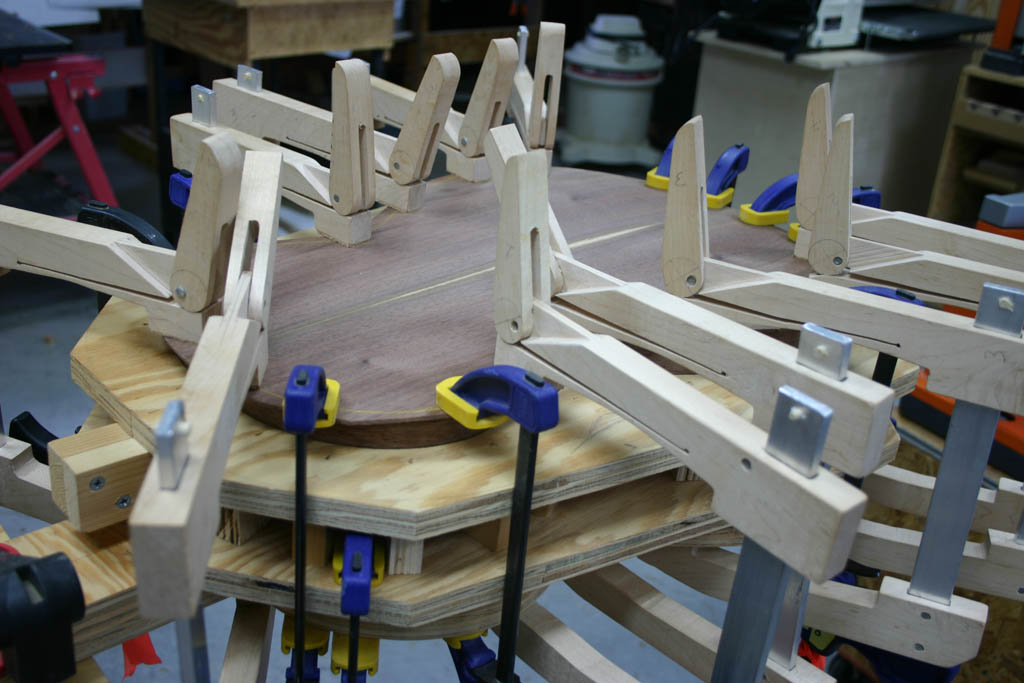
Here's the back being clamped on, with the rim in the form.
I attach the back first so that glue clean-up is easy. Since the inside of the back will be visible through the soundhole, you want it to look good.
Keeping the rim in the form while clamping keeps the body from flexing out of shape.
A workboard, in the shape of the guitar, provides a base for the clamps.
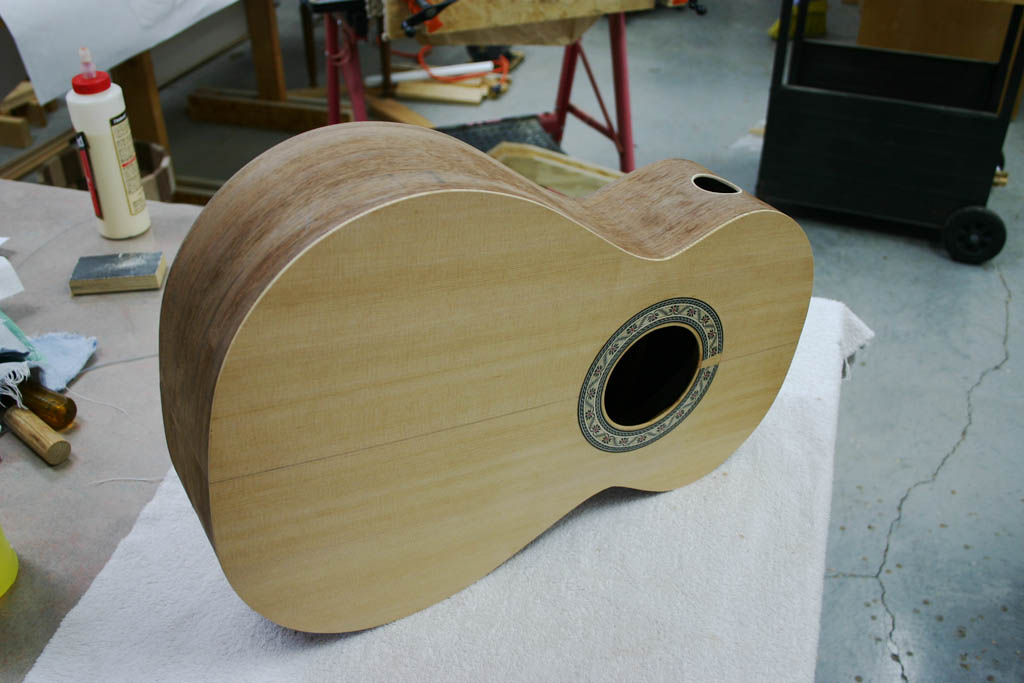
The back and the top are attached, oversize, to the rim and then trimmed flush to the sides. I use a flush trim bearing bit on the router, with the bearing riding on the side to trim the back and top.
And here's the assembled body with both back and top trimmed to fit.
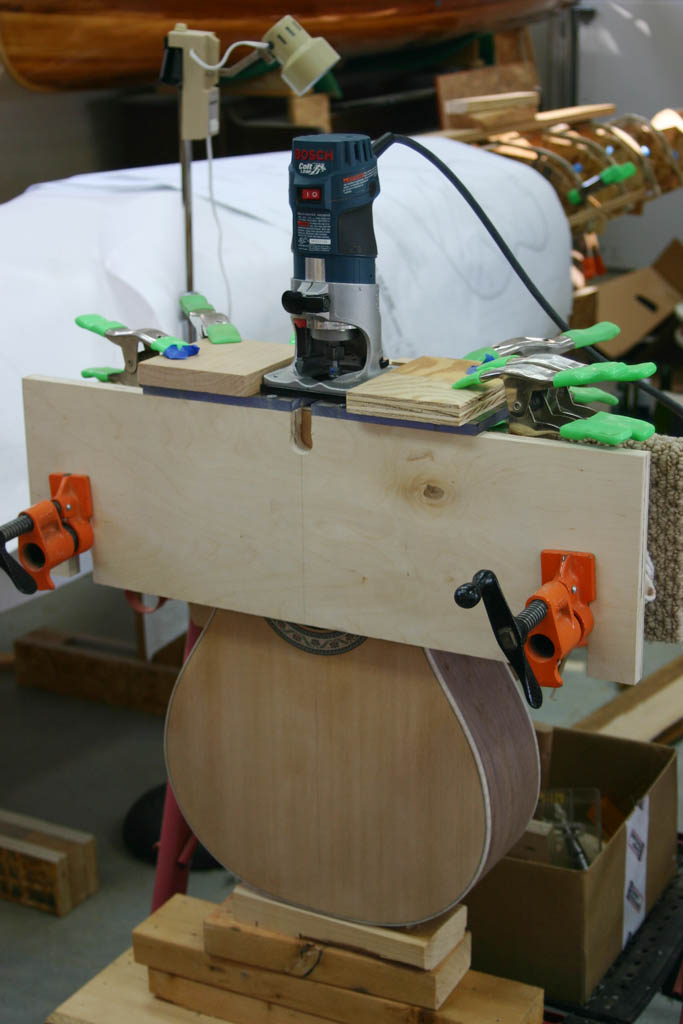
Routing the Binding Channel

I made a jig (original design by Harry Fleishman with modifications from D.E. Williams) for my Bosch Colt laminate trimmer to rout the binding and purfling channels.
You can get instructions on how to build this jig from here: http://www.dewguitars.com/BindingJig/Binding%20Jig.htm.
I prefer this jig over others because you have control over the router - you hold the router and move it around the guitar body, rather than move the guitar body through the router. If something doesn't feel right, just lift and move the router away from the body.

You can see the the completed stairstep purfling and binding channels.
I use the Stewmac bearing set - it's pricy but has bearings in .010" increments so it can handle most commercially available bindings.
When I make my own bindings, I make them so that I can use one of the bearings in the set, without a lot of leveling out later.
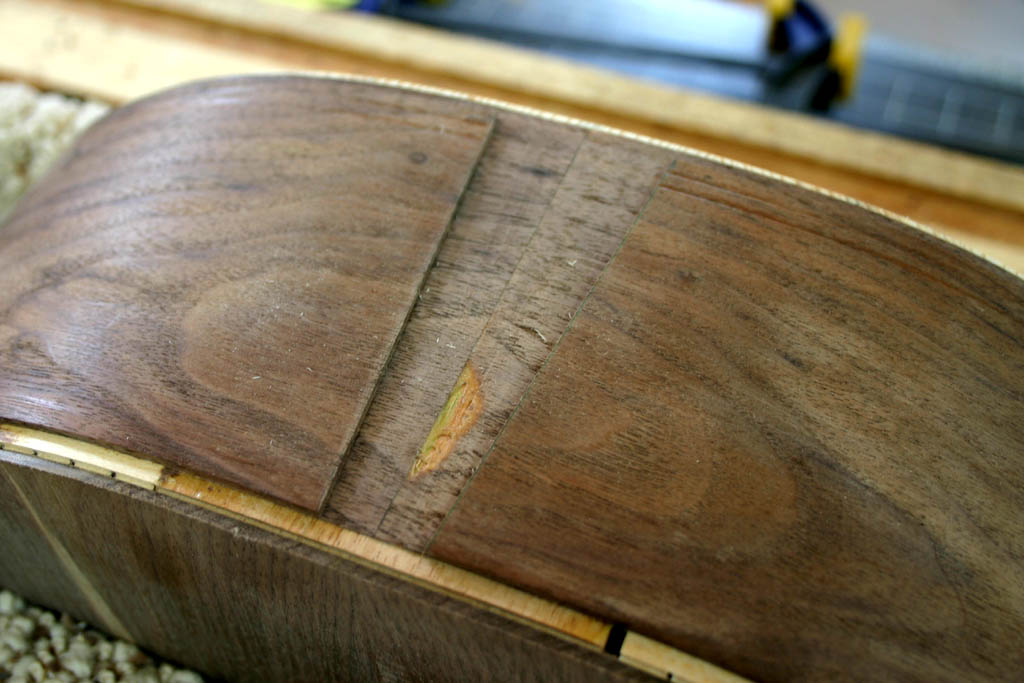
The End Wedge on the Prototype
I built a simple jig to help me stay in line while routing the channel for the end wedge.

I cut the wedge oversize and glue it in with purfling on both sides. Then trim it to the final size.

The wedge purfling will be mitered to fit the purfling adjacent to the top and back bindings so the wedge must extend into the binding channel the width of the purfling. You can see what this looks like in the next section below, after the binding is installed.
Click on the photo of the installed wedge to enlarge it and you'll see that the wedge extends into the binding channel - in this case by 0.040" (the width of the purfling).
Installing the Binding and Purfling

After the bindings were bent in the side bender, I put them in the body mold so they would hold their shape. These have the side black/white/black purfling strips attached.

Here the binding is being glued in. You can see that the blue tape needed some help at the waist.
And finally, all the bindings and purflings are on.
.
.
Cutting the Mortise on the Body for the Neck
I made a jig that fits into my pipe clamp vise (see the pipe clamp vise here) to rout the mortise in the body where the neck will attach.
I used the jig for the first time on Mike's guitar. I used an older jig that I made for cutting the end wedge on the prototype. The new jig is much easier to use.

As you can see in the photo (left), the new jig did a good job, and along with the neck tenon jig (below), it will allow me to get a consistent mortise and tenon joint.
| Prev (pg 1) | Next (pg 3) |